2Factor with Google Authenticator and Netscaler
Update January 9, 2018 This post is extremely old and before Citrix offered a real OTP solution. Please use Carl’s guide found here.
If you use 2factor for common websites like Gmail, Wordpress or maybe even your work chances you heard of the Google Authenticator app. It’s a very inexpensive way to add an additional layer of security for authentication and can be used for a wide variety of purposes. In this post we will configure an Ubuntu 14.04 server to work with Netscaler Gateway as a RADIUS server. Lets get started.
I would like to thank the author of http://www.supertechguy.com/help/security/freeradius-google-auth for a great starting point.
Radius Server Build
Ideally you will want this server to be joined to a domain so a user can logon with his or her own credentials to create the Google Authenticator account. This guide doesn’t go through these steps but there are plenty of resources out there to get to this point. The server can still work without being joined as long as the username that is created match the AD username.
Prerequisites
- Ubuntu 14.04 server deployed
- Static IP address set
- Login with sudo or root
-
Packages are fully updated
apt-get update && apt-get upgrade -y - Joined to the domain if possible
Install
- Install the required packages
apt-get install ntp build-essential libpam0g-dev freeradius git libqrencode3
-
Clone the files needed for the install and compile
git clone https://github.com/google/google-authenticator.git cd google-authenticator/libpam/ make make install -
Now edit the radius configuration file so it runs under root
nano /etc/freeradius/radiusd.conf -
Search for the line
user = freerad group = freerad -
Replace with
user = root group = root -
Now we want to enable PAM to be the default authentication type for RADIUS
nano /etc/freeradius/users -
Add this to the bottom of the file
DEFAULT Auth-Type :=PAM -
Enable the PAM module for the default instance
nano /etc/freeradius/sites-enabled/default -
Uncomment the line
# pam -
Edit what PAM modules to use
nano /etc/pam.d/radiusd -
Edit or add the following lines to match below
#@include common-auth #@include common-account #@include common-password #@include common-session # Google Auth + LDAP auth required /usr/local/lib/security/pam_google_authenticator.so -
Make a backup of the of the clients.conf file for RADIUS
mv /etc/freeradius/clients.conf /etc/freeradius/clients.conf.bak -
Create new conf file
nano /etc/freeradius/clients.conf -
Create a client entry using the NSIP of your Netscaler for ipaddr variable. (Remember to create entry for each NSIP)
client netscaler { ipaddr = 192.168.2.221 secret = mysecret shortname = NS } - Now either create a user on the server or login as a domain user. The username must match what will be used for authentication.
-
SSH in via putty with the newly created name and run the following.
google-authenticator -l "${USER}@mylab.com" -i "Lab" - You will want to press Y to start the process and probably Y for the rest of the responses for the best security. If its just a lab then it might make sense to read through and chose the best options for testing. This will generate a QR code to be used for the mobile app to add the account. If the code looks a little messed up you will need to make the putty window larger and rerun. If successful you should see the new account listed in the Google Authenticator app. If you have issues scanning the QR code you can always create the account with the information displayed.
RADIUS Server Troubleshooting
- Check /var/log/freeradius/radius.log
- Run the freeradius under debug by stopping the service “service freeradius stop” and running freeradius -XXX to output logging to the console
Netscaler Configuration
Now that we have the RADIUS server setup we can configure the Netscaler authentication policy. This assumes you already have a Netscaler Gateway instance configured.
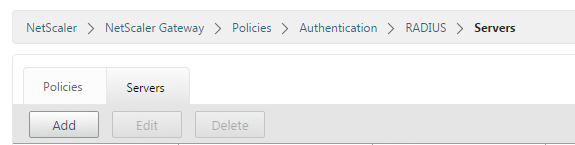
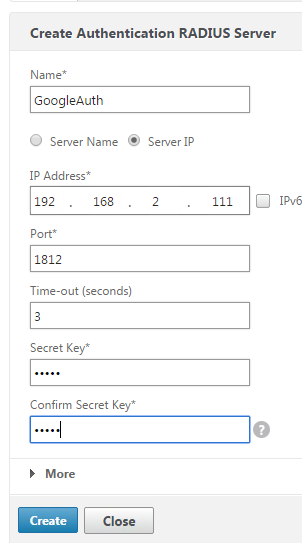
- Login to the Web gui and lets add the RADIUS server
- The IP address is the IP of the server we created above and the secret is the one we added to the clients.conf
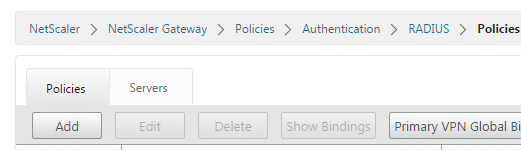
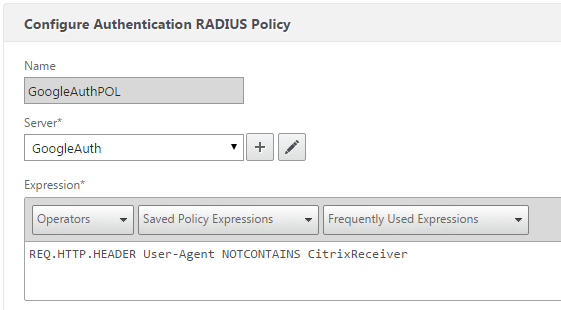
- Now we will create the policy and use the RADIUS server we just created
-
The expression in the policy I created only applies to non Citrix receiver connections
REQ.HTTP.HEADER User-Agent NOTCONTAINS CitrixReceiver -
If you prefer to utilize RADIUS for all connections use the expression below instead
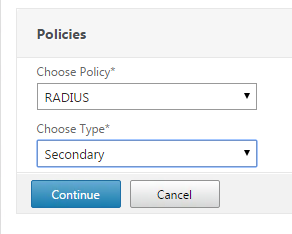
ns_true - Now we bind the RADIUS policy we created to the Netscaler Gateway. Make sure the type is set to “secondary”.
- Now when the Netscaler Gateway is accessed there should be a second logon box
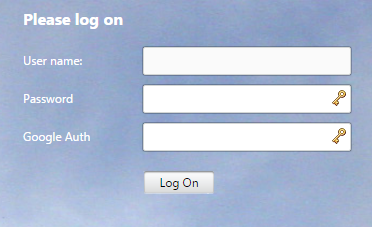
- Please note “Google Auth” is a customization in the 11.0 theme. Otherwise it will say “Password 2”
Netscaler Troubleshooting
- If the login doesn’t process correctly we can check what the RADIUS server is reporting back by looking at the AAA.debug
- SSH into the Netscaler with nsroot
-
Run to view the realtime authentication requests
 shell
 cat /tmp/aaad.debug
Leave a comment