Dynamically Load Balance Services with Netscaler CPX
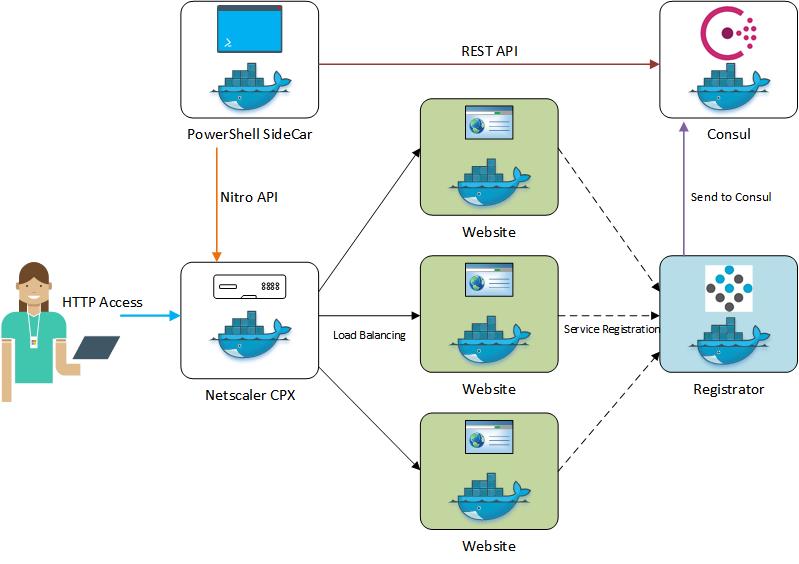
This guide covers how a Netscaler CPX can be quickly deployed to automatically load balance web containers from a Docker-Compose file based on the number of web containers deployed. The setup uses a PowerShell based script contained in a sidecar image that will add or remove servers from the Netscaler service group based upon the services registered in Consul. This guide is roughly based off of Chiradeep Vittal’s demo found here. For this guide I use Ubuntu 16.04 along with Docker 1.13 and Docker Compose 1.17.1.
Setting up Docker Host
Won’t go into a lot of detail on installing Docker along with Docker Compose since Docker provides great instruction.
Once Docker is installed you’ll also want to make sure git is installed.
apt-get install git
Now that the host is ready let’s pull down the Git repo and enter the directory
git clone https://github.com/ryancbutler/NetscalerCPXDemo.git
cd NetscalerCPXDemo
The file structure will look like
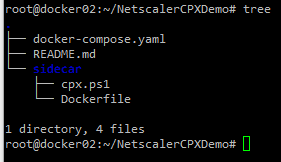
Docker-Compose
The entire environment is deployed with Docker Compose so let’s deploy the environment and review the contents of this file.
docker-compose up -d --scale web=3
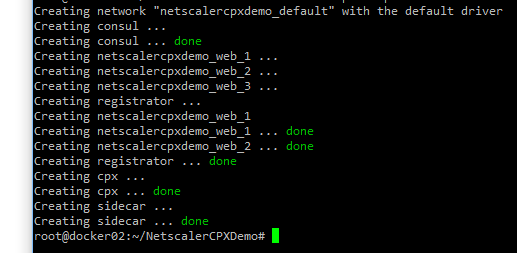
This process will take time since it has to pull the images down over the internet and build the sidecar image. The command is going to run all services cointained in the file along with 3 web containers from the “–scale” argument and run in daemon mode which will return you back to the bash prompt. The output should be similar.
Web
Starting out of order but the simplest of the services is the website we want to loadbalance. Running docker ps you will see all the running containers including the 3 web servers we deployed and port mappings on the right.
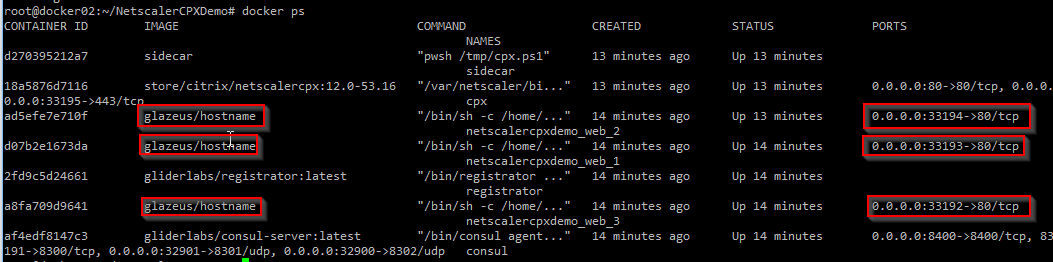
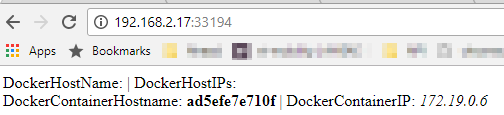
Opening a web browser and going to http://dockerhostip:33194 will return the website which also includes container information. This port and IP change each and everytime the container is started. This is where service registration becomes important for any automation.
CPX
Netscaler CPX is used to load balance the web containers we deployed. The CPX does not include the web gui which is familar to many Netscaler admins but includes Nitro API access and CLI. To access the CLI you will need to find the port SSH is running on. From the docker ps command you will find what port 22 is forwarded from.

Now use Putty or another SSH client and instead of port 22 use 33196. (Again, this port changes at every start). Login with the familar nsroot\nsroot combination.
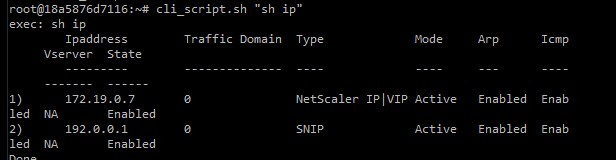
From SSH you will be able to run familar CLI commands but having to front the command with cli_script.sh. For example to show the NS ips.
Check on the load balanced server with
cli_script.sh "sh lb vserver"
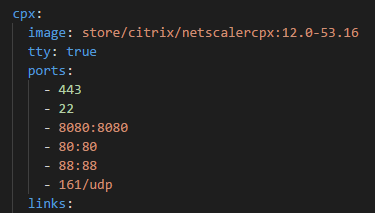
Notice the LB server is bound to port 88 and if you check docker ps you’ll see notice port 88 is bound to 88. What gives? Thought it was supposed to change and be some odd port number? If you look at the docker-compose file you will see the port assignments listed which maps the host port to the container port. In this case you will see 88:88 (amongst others) which makes port 88 available from the host everytime. 80 and 8080 are reserved for the Netscaler API.
Lets test the connectivity by opening a browser and going to http://dockerhostip:88 which is now hitting the CPX load balancer created by the sidecar. Hit refresh a couple of times and you should notice the docker information changing within the webpage since its hitting a different container each time.
Consul
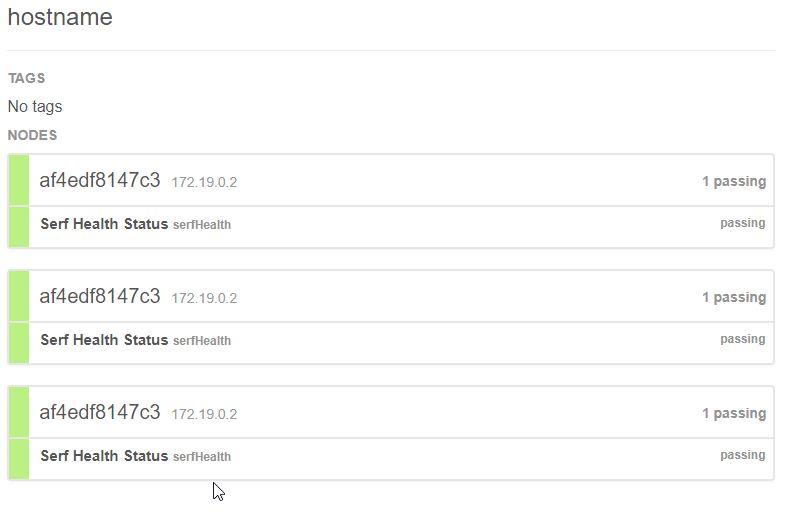
Consul is a tool for service discovery that relies on an API to store values within its container. This allows the sidecar to query for specific IPs and ports used by the web docker containers for backend load balancing. And now that the container is running you can access the GUI at http://dockerhostip:8500 where you will be able to view found running services. Notice the service ‘hostname’ which relates to the simple website we are running based on the image name being pulled down. Selecting the service will show you container information including IPs
The GUI is nice but the API is what is primarily used for other containers to poll service information. The same GUI information can be pulled from the API at http://dockerhostip:8500/v1/catalog/service/hostname using Postman. This API is whats needed for the sidecar to tell which containers are running the web service.

Registrator
Registrator automatically registers and deregisters Docker services with Consul in the environment. Registrator looks at the Docker daemon and automatically registers services based on the ports mapped to the container.
Sidecar
I decided to use PowerShell for the sidecar but could really be any language the supports the NITRO API like Python. I find PowerShell the easiest to code with, most familar to Windows admins and got a chance to run it in a linux container for the first time. :)
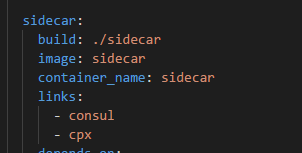
The sidecar image is actually built vs downloaded like the rest since it needs to contain my custom PowerShell script. In the docker-compose file you’ll notice the build command with the location of the Dockerfile in the sidecar folder.
The Dockerfile includes instructions on how to build the sidecar image. The instructions in the file break down to the following:
-
Use the Microsoft PowerShell image
FROM microsoft/powershell -
Copy my script to the image
COPY cpx.ps1 /tmp -
Run PowerShell commands that install the needed Netscaler module to be used
RUN pwsh -c "Set-PSRepository -Name "PSGallery" -InstallationPolicy Trusted" && \ pwsh -c 'install-module netscaler -force -confirm:$false' -
Sets the image to run my script when its run
ENTRYPOINT ["pwsh", "/tmp/cpx.ps1"]
cpx.ps1 does the following:
- Gets the IP of the CPX using the Consul API
- Uses the Netscaler PowerShell module to create a load balancer based on the discovered CPX IP
- Creates an empty load balancing service group
- Pulls the hostname service IPs (AKA the container IPs that are running the website) from Consul
- Adds the found service IPs to the CPX LB service group
- Binds the service group to the load balancer and enables the service vip
- Enters an infinite loop that checks for any changes to the services and adjusts the service group to by adding or removing containers
Scaling
When we initally deployed the environment we deployed 3 web containers. You’ll be able to see the PowerShell process when it added the inital containers to the service group by running:
docker logs sidecar
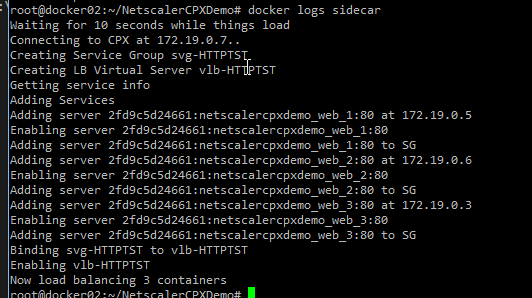
You can see from the output of the PowerShell script the CPX is load balancing 3 containers. How about we add some more? Lets add enough for a total of 10 backend web containers.
docker-compose scale web=10
You’ll see the new containers being created. Check the logs of the sidecar again
docker logs sidecar
You will now see the output showing a total of 10 containers being added to the service group and being load balanced.

If you want to bring the amount of web services down simply run:
docker-compose scale web=2
Docker logs will show that the removed containers were removed from the service group
Cleanup or Redeploy
To bring all of the containers down run:
docker-compose down
If you now run docker ps it will show all the containers are stopped and removed.
If you want to redeploy the environment with some adjustments you made to the cpx.ps1 script the sidecar image will need to be rebuilt. This can be achieved with the --build argument
docker-compose up -d --scale web=3 --build
Leave a comment