Use Packer and Vagrant to Create a Local MDT Lab
Uses Packer and Vagrant to create a local MDT lab leveraging Automation Framework Community Edition running on Virtual Box.
Located here: https://github.com/ryancbutler/mdt-lab-vagrant
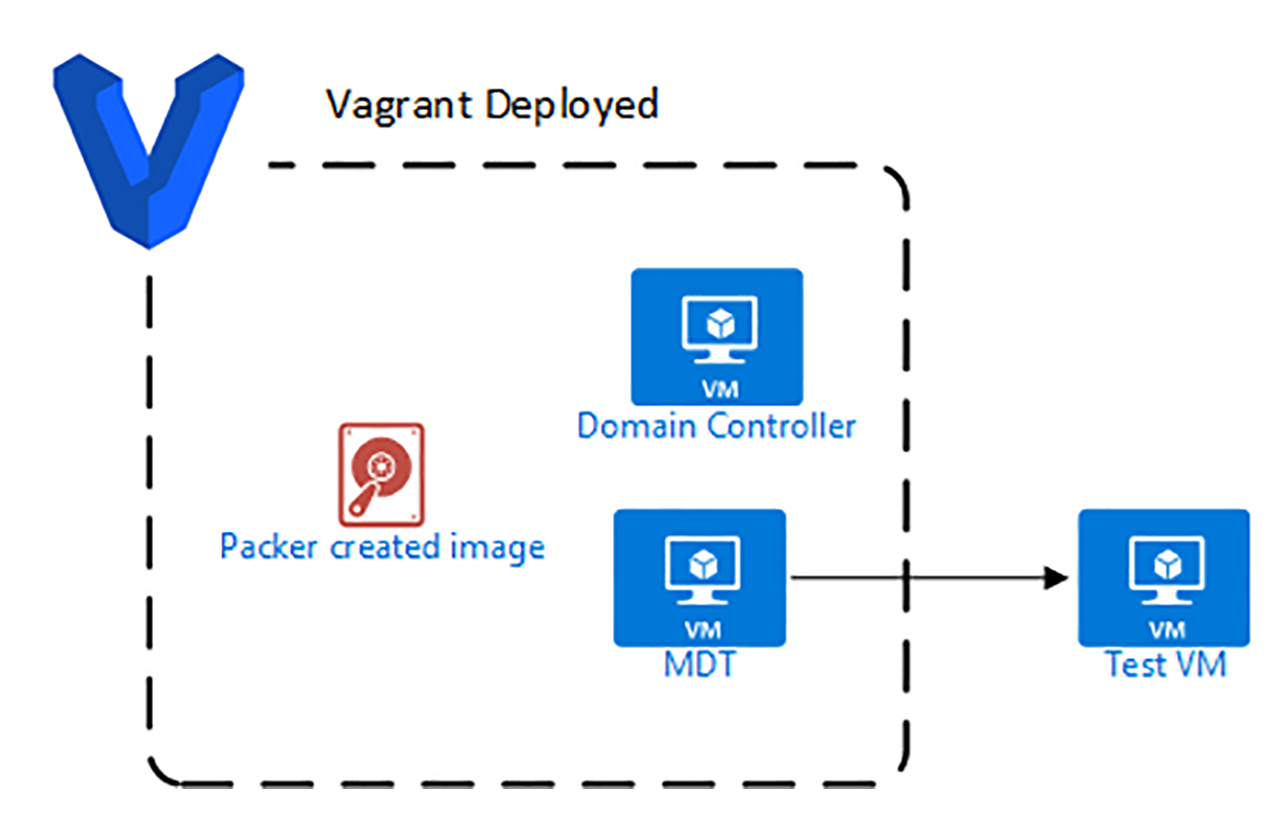
Creates the following
- 2019 Datacenter image created via Packer
- 2019 Domain controller via Vagrant
- 2019 MDT server via Vagrant
- DHCP server and scope
- AFCE installed
- WDS (Windows Deployment Services) installed, patched and configured
Big thanks
- Trond Eirik Haavarstein for dedicating a massive amount of time for making MDT super easy to get started with. Check out the paid version of Automation Framework for even more automation goodness.
- https://github.com/haavarstein/Automation-Framework-Community-Edition/
- Rui Lopes for so many awesome Packer and Vagrant scripts used for this.
- https://github.com/rgl/windows-vagrant
- https://github.com/rgl/windows-domain-controller-vagrant
Pre-Reqs
The following needs to be done on the local PC:
- Clone
git clone https://github.com/ryancbutler/mdt-lab-vagrant.gitor downloadhttps://github.com/ryancbutler/mdt-lab-vagrant/archive/master.zipthis repo - Download and copy a Windows 2019 Eval ISO to repo dir (eg “C:\mdt-lab-vagrant")
- Virtualbox installed
- Vagrant installed
- Packer installed
Note: All these can be installed with choco
#Install choco if needed
Set-ExecutionPolicy Bypass -Scope Process -Force; [System.Net.ServicePointManager]::SecurityProtocol = [System.Net.ServicePointManager]::SecurityProtocol -bor 3072; iex ((New-Object System.Net.WebClient).DownloadString('https://chocolatey.org/install.ps1'))

choco install -y virtualbox packer vagrant
Vagrant Plugins
vagrant plugin install vagrant-windows-sysprep
Packer Plugins
choco install packer-provisioner-windows-update
Build Windows 2019 Image
First we need to build the 2019 Datacenter image using Packer. This can take awhile.
cd packer
packer build -only=windows-2019-amd64-virtualbox windows-2019.json
#When completed
vagrant box add --name "windows-2019-amd64" -f windows-2019-amd64-virtualbox.box
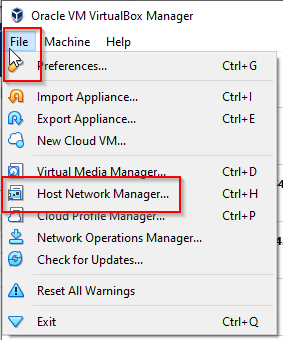
Virtual Box Setup
While the image builds we can adjust our virtual box network and create our temp machine
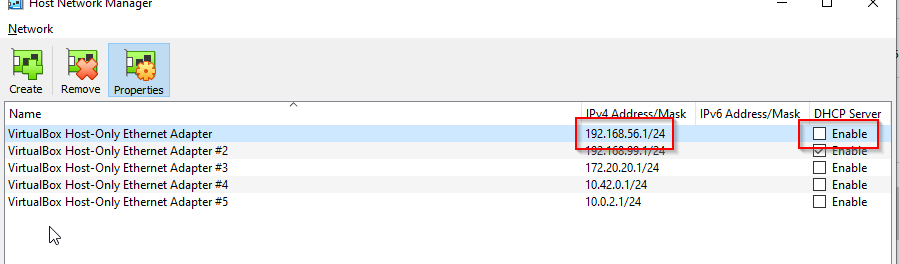
Network
DHCP must be disabled on the 192.168.56.0/24 Virtual Box host-only network
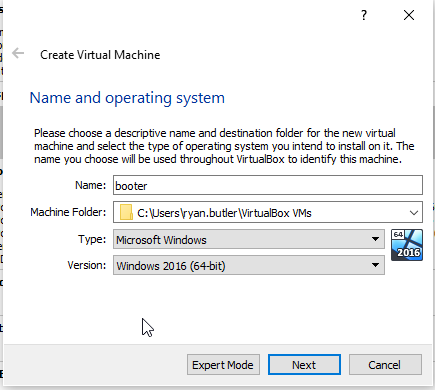
Test VM
This VM will be used to actually test MDT with
- Create a new VM
- Adjust memory anything you can spare. 2GB should work.
- Create a new virtual disk with VDI (format doesn’t really matter)
- Dynamically allocated
- Suggest 40gb plus for size
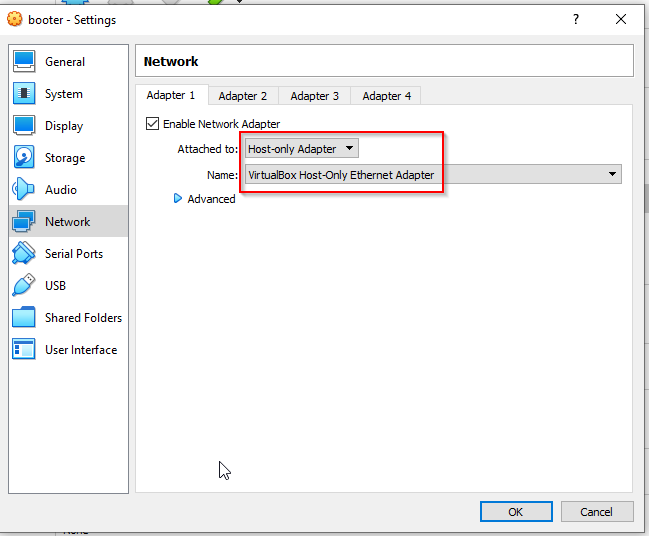
- After machine is created select Settings and Network on the left
- Set adapter 1 to host-only
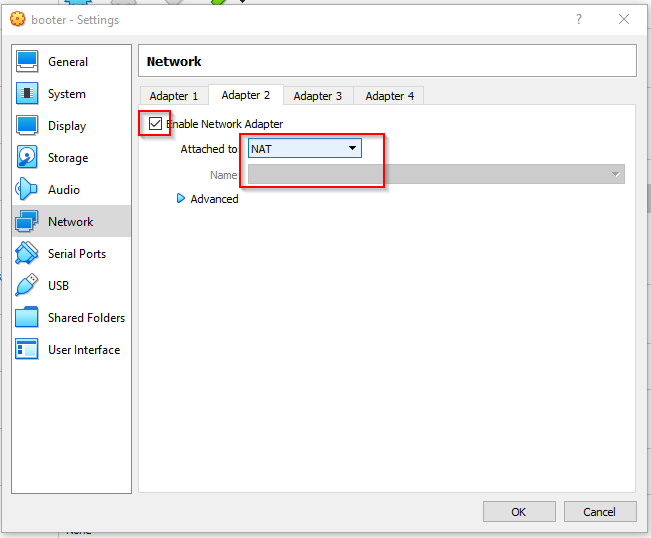
- Set adapter 2 to NAT (this will allow internet access)
Run Vagrant
This will deploy the environment using the Packer image created earlier
#If still in Packer dir
cd ..
#From repo root
#may need to run as admin
vagrant up
Connecting
- Once the Vagrant deployment is complete you can access the MDT server with
vagrant rdp mdtorvagrant powershell mdt - mylab\vagrant can be used for authentication
- Configured as Domain and Enterprise admin
- Local administrator password is set to P@ssw0rd
Test MDT
- Boot your test VM and
- Cancel the intial boot disk screen (only shows once)
- Press F12 at the bios screen
- Select l to boot from lan
- PXE process should pickup from here
- Happy labbing
Power environment down
vagrant halt
Destroy Environment
vagrant destroy -f
Leave a comment